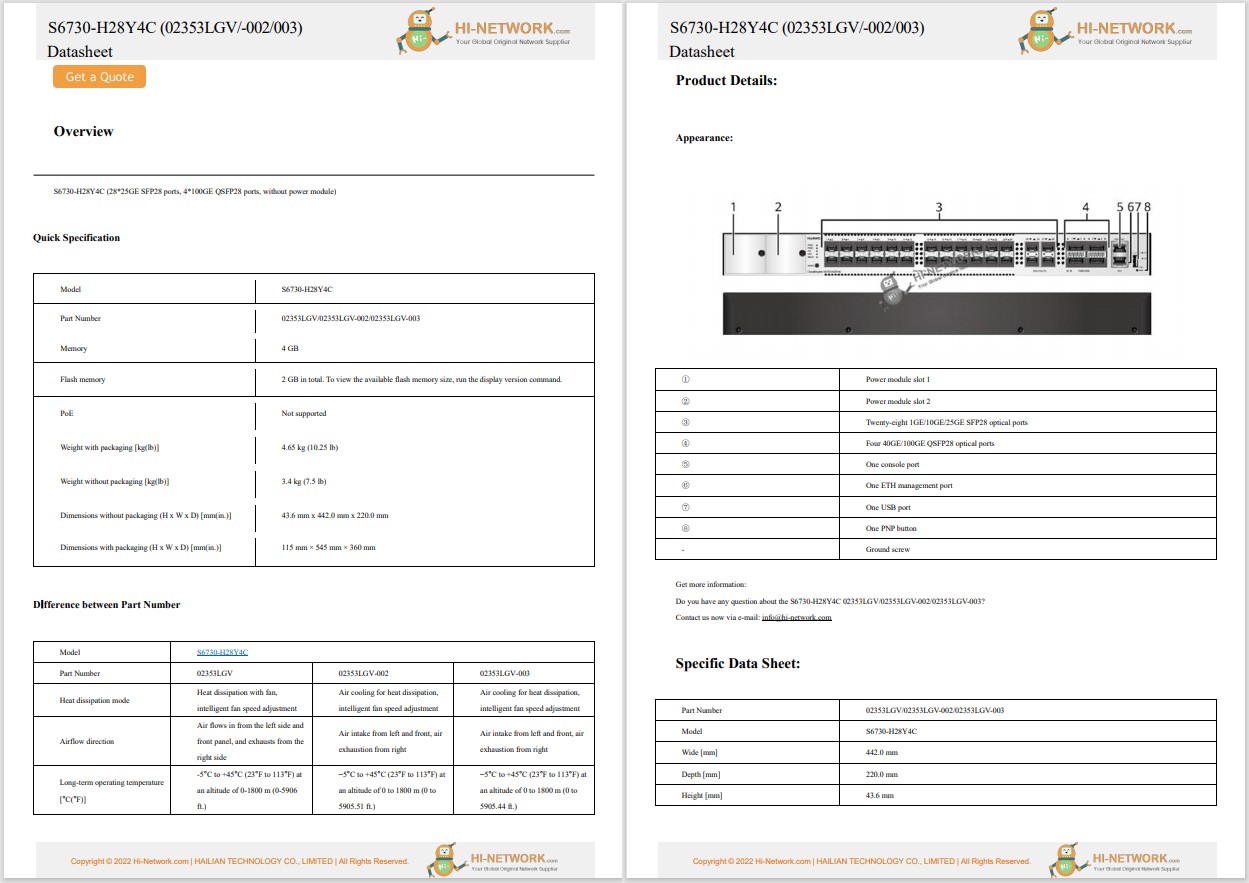
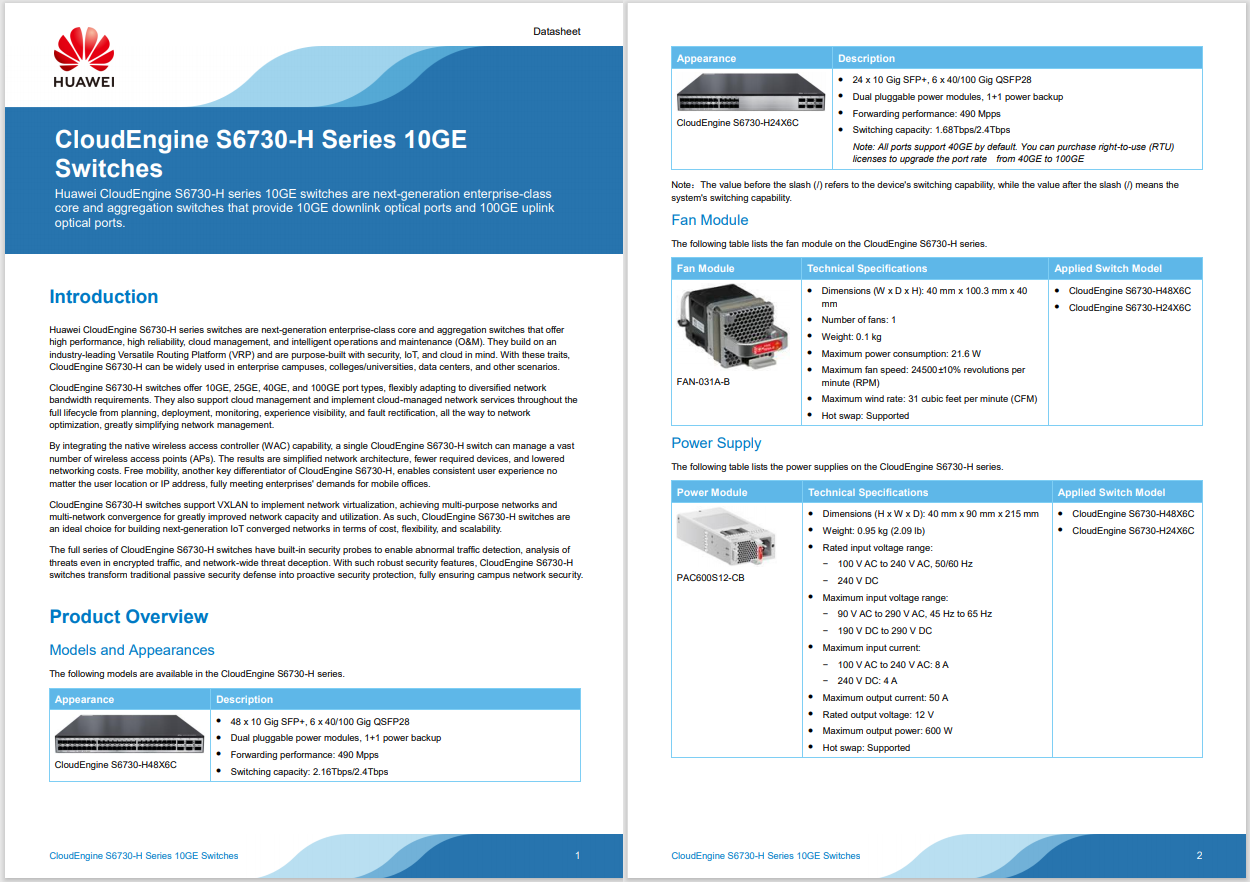
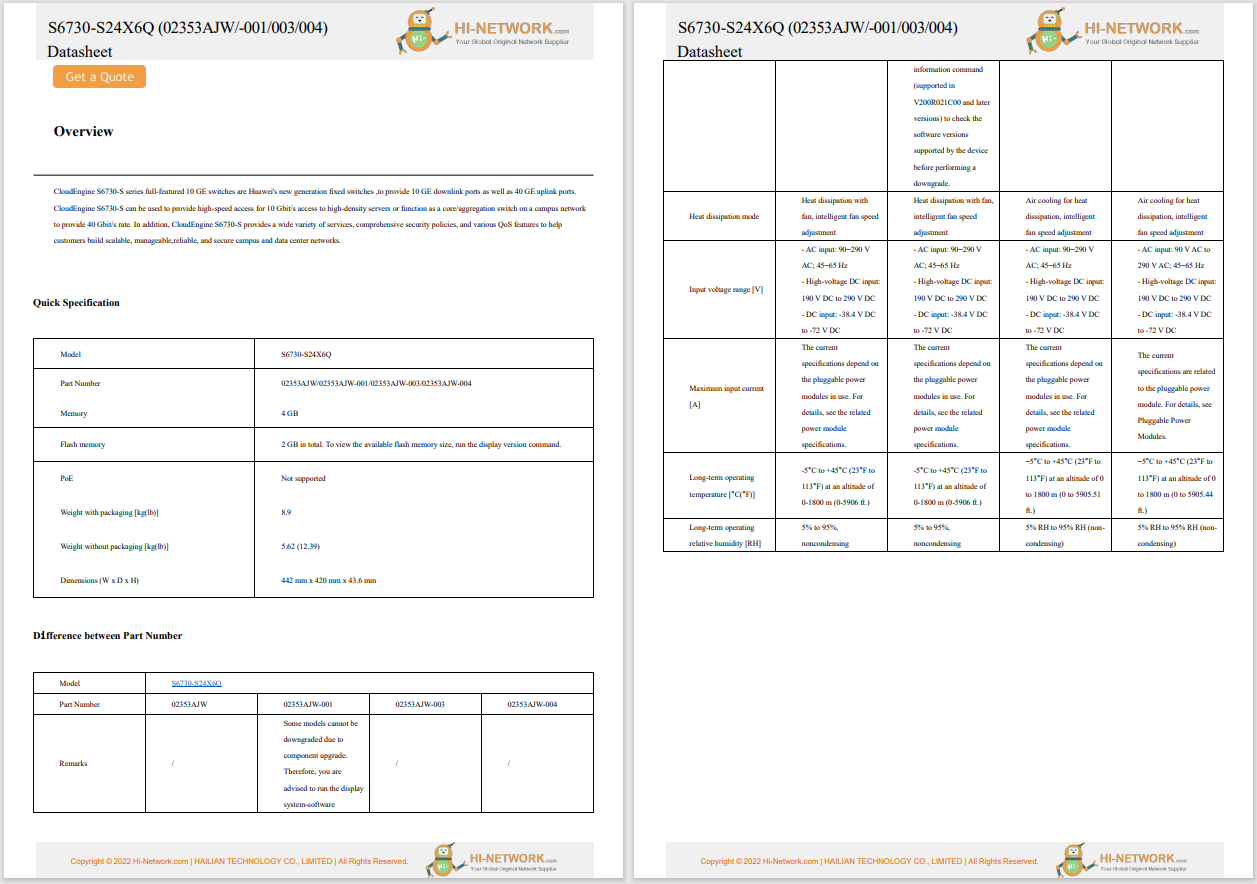
Register now for better personalized quote!

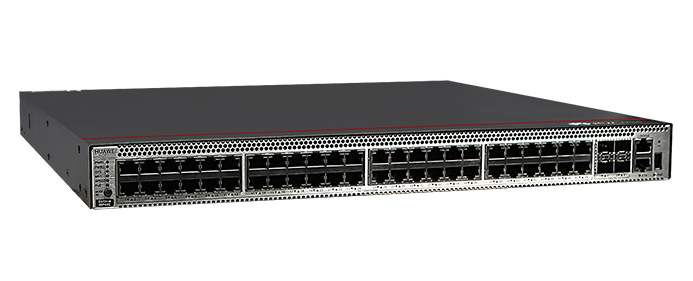
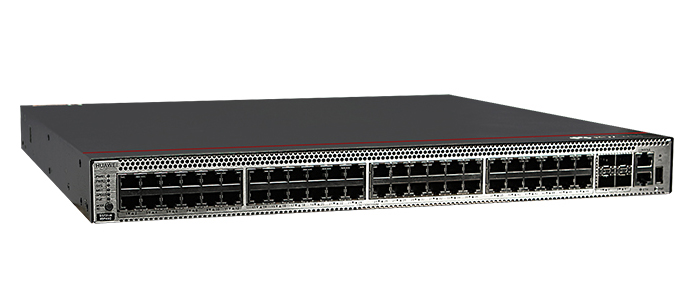

The Cisco Catalyst 9300 Series switches (C9300) are built for the evolving landscape of enterprise networking, offering high performance, modular flexibility, and advanced features. This guide provides a step-by-step approach to installing the Cisco 9300 switches, ensuring a successful and smooth deployment.
Before you begin the installation process, it is essential to inspect the switch to ensure all components are present and undamaged. Follow these steps:
1. Verify Package Contents
- Cisco Catalyst 9300 switch
- Power cords
- Rack-mount brackets and screws
- Console cable
- Documentation and warranty information
2. Inspect for Physical Damage
Carefully examine the switch for any signs of physical damage during shipping. If you notice any issues, contact Cisco support immediately.
1. Environmental Requirements
Before installing the Cisco 9300 switch, make sure the environment meets the following criteria:
Temperature: 32°F to 104°F (0°C to 40°C).
Humidity: 5% to 95% non-condensing.
Airflow: Ensure proper ventilation for adequate cooling.
2. Tools Required
Ensure you have the following tools ready for installation:
- Phillips screwdriver
- ESD wrist strap
- Rack-mount kit
The Cisco Catalyst 9300 can be installed in a standard 19-inch equipment rack using the included rack-mount brackets. Here are the steps for rack installation:
1. Attach the Rack-Mount Brackets
- Use the screws provided in the rack-mount kit to secure the brackets to the sides of the switch.
- Ensure the brackets are firmly attached and properly aligned with the rack holes.
2. Mount the Switch in the Rack
- Lift the switch and carefully position it in the desired rack space.
- Align the brackets with the rack's mounting holes and secure the switch using the screws.
3. Connect Grounding Wire
- Locate the ground lug on the back of the switch and attach a grounding wire for safety.
- Ensure the wire is properly connected to a verified earth ground.
Once the switch is securely mounted, you can proceed with powering it on.
1. Connect Power Cables
- Plug the AC power cord into the switch's power supply unit (PSU).
- Connect the other end of the power cord to a power outlet or PDU (Power Distribution Unit).
2. Power On the Switch
- The switch will begin to boot up automatically after being connected to power.
- Observe the LED indicators on the front panel to confirm the switch is powering up correctly.
3. Verify POST (Power-On Self-Test)
- During bootup, the switch performs a POST to check hardware functionality.
- Ensure all system LEDs display a solid green or blinking green status, indicating a successful POST.
To configure the switch, you'll need to establish a console connection. Here’s how:
1. Connect Console Cable
- Use the provided RJ-45 console cable to connect the console port on the switch to your computer’s serial port.
- If your computer doesn’t have a serial port, use a USB-to-serial adapter.
2. Open Terminal Software
- Open a terminal emulator such as PuTTY, Tera Term, or HyperTerminal.
- Configure the terminal with the following settings:
Baud Rate: 9600
Data Bits: 8
Stop Bits: 1
Parity: None
Flow Control: None
3. Access the CLI (Command-Line Interface)
- Once connected, press "Enter" to access the switch's CLI.
- You should see the command prompt, indicating a successful connection.
Now that the console connection is established, you can configure the switch. Begin with basic setup commands.
1. Enter Global Configuration Mode
- At the command prompt, type:
enable
configure terminal
2. Set Hostname
- Assign a hostname for the switch:
hostname SwitchName
3. Configure Management Interface
- Assign an IP address to the management interface:
interface vlan1
ip address 192.168.1.1 255.255.255.0
no shutdown
4. Set Enable Secret Password
- For security, configure a password for privileged EXEC mode:
enable secret password
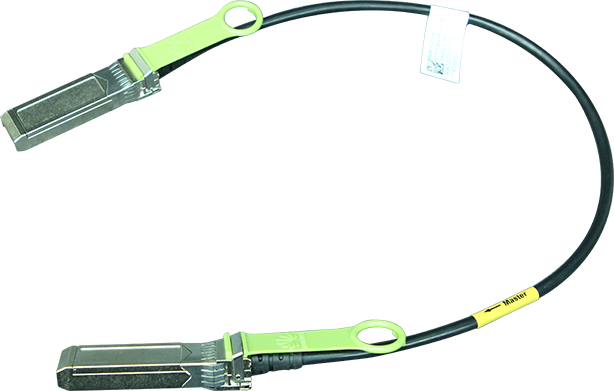
If you are deploying multiple Cisco 9300 switches, you can stack them for easier management and redundancy.
1. Connect StackWise Cables
- Use the StackWise-480 cables to connect the StackWise ports between switches.
- Ensure that the StackWise cables form a loop for redundancy.
2. Power On the Stack
- Power on all switches in the stack configuration.
- The switches will automatically elect a Stack Master based on configuration.
3. Verify Stack Configuration
- Once the switches are up, use the following command to verify the stack status:
show switch
- Ensure all switches are properly detected in the stack.
Here are the key technical details of the Cisco Catalyst 9300 Series switches:
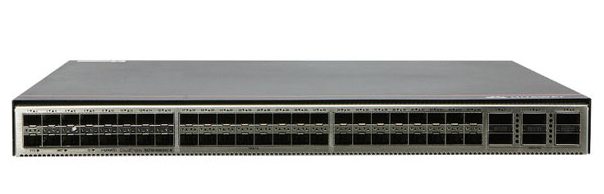
Ports: 8 x 1GbE PoE+ ports, 2 x 10GbE uplink ports
Switching Capacity: Up to 480 Gbps
Stacking Capacity: 480 Gbps with StackWise-480
Forwarding Rate: Up to 360 Mpps
Power Supply: Modular power supply options: 350W, 715W, or 1100W
PoE Power Budget: 437W, 715W, or 1100W (dependent on model)
Dimensions (H x W x D): 1.73 x 17.5 x 17.5 inches (4.4 x 44.5 x 44.5 cm)
Weight: 15 lbs (6.8 kg)
Operating Temperature: 32°F to 104°F (0°C to 40°C)
If you encounter issues during installation, here are some common problems and troubleshooting tips.
1. Switch Fails to Power On
- Ensure the power cord is securely connected to both the switch and the power outlet.
- Verify that the power outlet is functioning correctly.
2. No Console Output
- Check the console cable connection to ensure it is properly seated in both the switch and the computer.
- Verify terminal settings (baud rate, data bits, stop bits, etc.) are configured correctly.
3. POST Failure
- Check the system LED to identify the error code.
- Refer to the Cisco documentation for a detailed explanation of the POST error.
Installing the Cisco Catalyst 9300 series switches is a straightforward process when the steps are followed carefully. Ensuring the switch is properly mounted, powered, and configured is critical for a successful deployment. By adhering to this guide, you can be confident in setting up and configuring the Cisco 9300 switch for optimal performance in your network.
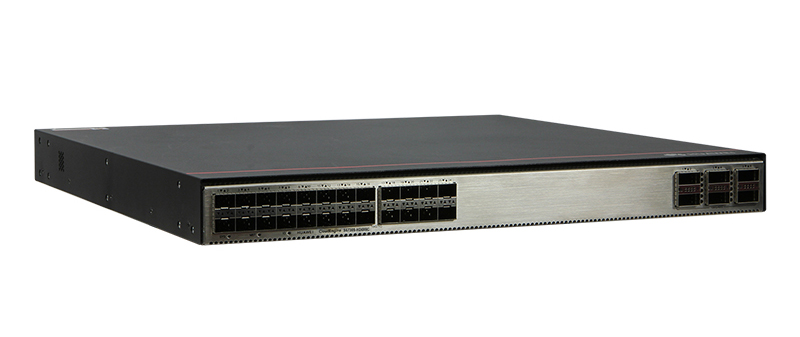
Cisco Catalyst 9300 Series Switches
For Cisco product list and quote, please visit: https://www.hi-network.com/categories/cisco or contact us at www.hi-network.com (Email: [email protected])
 Hot Tags :
CISCO Switches
Hot Tags :
CISCO Switches
Register Email now for Weekly Promotion Stock
100% free, Unsubscribe any time!
Add 1: Room 605 6/F FA YUEN Commercial Building, 75-77 FA YUEN Street, Mongkok KL, HongKong Add 2: Room 405, Building E, MeiDu Building, Gong Shu District, Hangzhou City, Zhejiang Province, China
Whatsapp/Tel: +8618057156223 Tel: 0086 571 86729517 Tel in HK: 00852 66181601
Email: [email protected]
 English
 Pусский
 Français
 Español
 Português