Register now for better personalized quote!

The quickest and easiest way to add terabytes of storage, whether at home or the office, is with a network-attached storage device like the Synology DS223j.
Synology/While cloud storage solutions certainly have their advantages -- and we've reviewed some of the top cloud storage options -- there are times when nothing beats having lots and lots of on-site storage at your fingertips. This way, there's never an excuse for not keeping all those photos and videos you shot, or not having up-to-date backups of all your systems.
And the quickest and easiest way to add terabytes of storage, whether at home or the office, is with a network-attached storage (NAS) device. A NAS is a box that you fill with hard drives, attach to your network, and make available across a whole host of devices. You can set various file access permissions, and also add features such as automatic backups and media server capability.
Also: How to set up your own NAS for more reliable data backups
Synology, one of the biggest and best names in NAS, offers NAS solutions big and small, from one-drive units to 12-bay behemoths. I've used Synology NAS devices for years, and they've performed flawlessly.
But it's time to upgrade one of my smaller units to the new Synology DS223j 2-bay model.
(My colleague David Gewirtz recently produced a video that steps through the set-up of Synology's 6-bay NAS.)
The DS223j has been designed for small teams to share, sync, and collaborate efficiently. Files on the system can be managed from anywhere using the Synology Drive app, available on PC, Mac, Linux, Chromebook, Android, iOS, or any device that has a browser.
View at AmazonFor under$200, you can pick up adiskless DS223j NAS and add your own drives (a good choice of drives are the4TB WD Red Plus drives specifically designed for NAS).
But how hard is it to put hard drives into a NAS?
It's easy! All you need is a screwdriver. I'll walk you through the assembly process.
Also: Top network-attached storage devices: Synology, QNAP, Asustor, and more
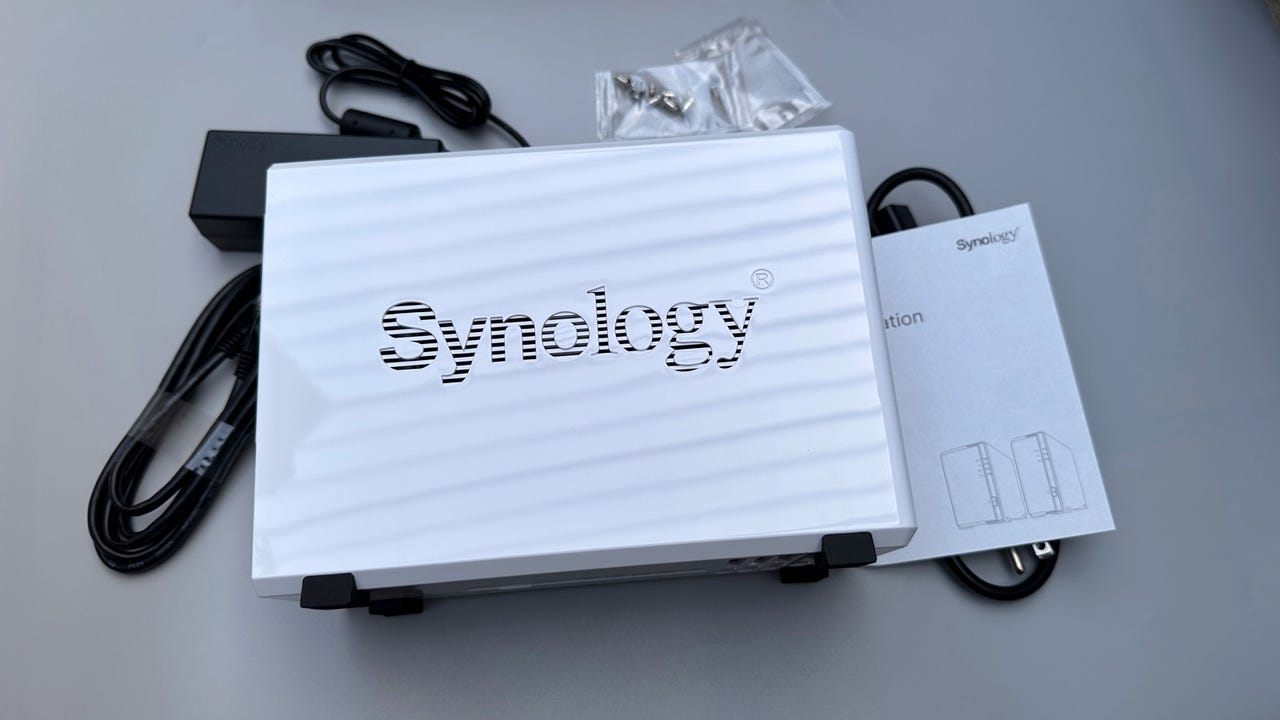
Step one is to unbox your NAS and get it ready to take the drives. Along with the NAS box, you get a power adapter, cables, and screws.
The plastic clamshell case slides apart. It is supplied without any fixing screws to make it simple.
The Synology DS223j has two drive bays. The drives slide into the bays and they are held in place with screws.
Start with the bottom one, slide it all the way in until the connectors engage, and then fit the second drive.
Also: I found the ultimate external SSD - and it can even self-destruct
The drives are held in place using screws -- the big, long screws with the smooth shoulders are the only screws that will fit, so you can't get it wrong. Each drive is held in place using four screws inserted through the vibration-dampening rubber. Note: There's no need to overtighten these screws.
Don't overtighten the screws as this can damage threads
Adrian Kingsley-Hughes/A lot of people forget to fit this plate, which is used to support the back of the drives. It's not entirely essential, but I like to fit it to give the drives maximum stability.
Two fine-thread screws hold the plate to the NAS, and it attaches to each drive using a single screw.
Drive supporting plate fitted
Adrian Kingsley-Hughes/The side cover slides into place, and is held in place using two coarse-thread screws.
Not much left to do now in terms of assembly other than to connect the Ethernet cable (the other end goes into your router or network switch), and the power supply.
All that's left is to power up the NAS.
Also: I tested the 'fastest Gen5 SSD on the planet' and was blown away
 Hot Tags :
Computing
Storage
Hot Tags :
Computing
Storage
Register Email now for Weekly Promotion Stock
100% free, Unsubscribe any time!
Add 1: Room 605 6/F FA YUEN Commercial Building, 75-77 FA YUEN Street, Mongkok KL, HongKong Add 2: Room 405, Building E, MeiDu Building, Gong Shu District, Hangzhou City, Zhejiang Province, China
Whatsapp/Tel: +8618057156223 Tel: 0086 571 86729517 Tel in HK: 00852 66181601
Email: [email protected]
 English
 Pусский
 Français
 Español
 Português