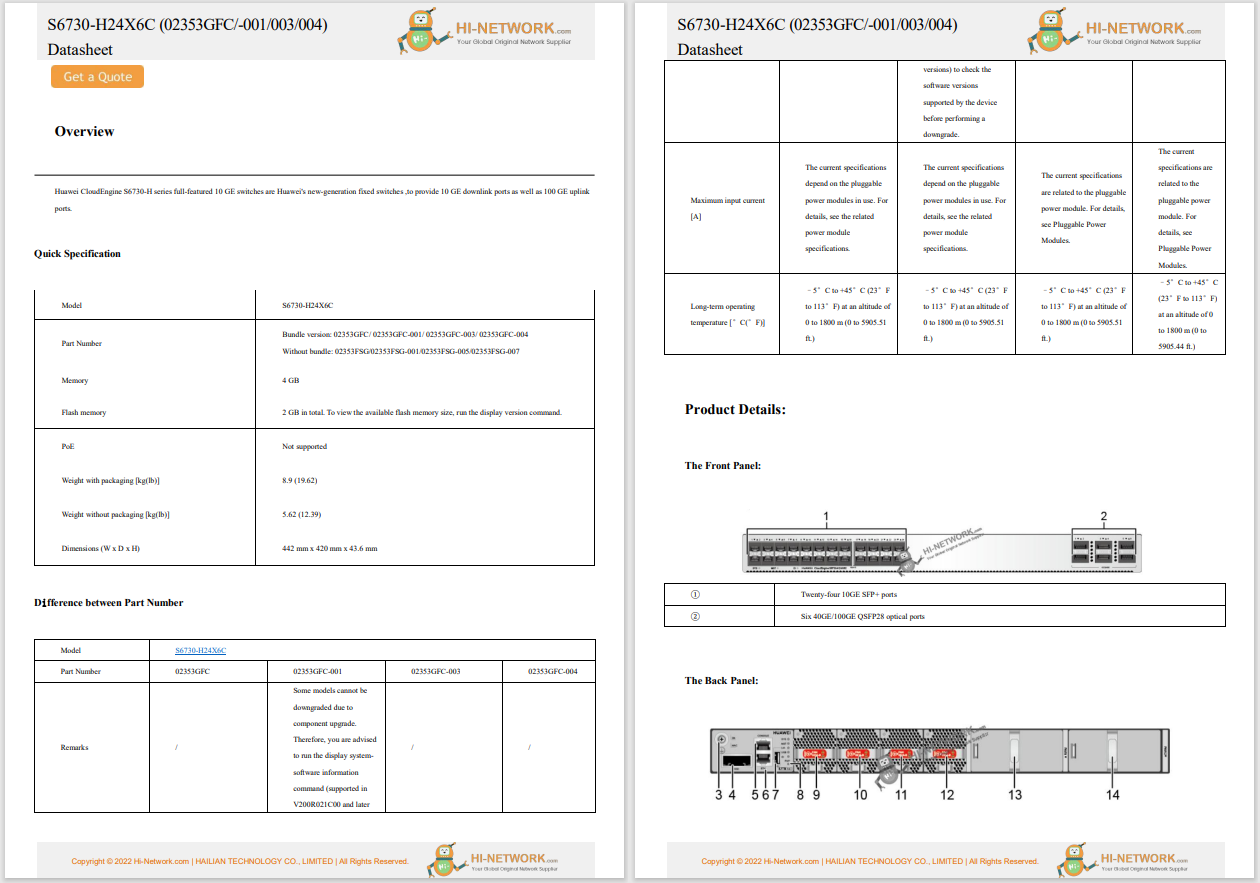
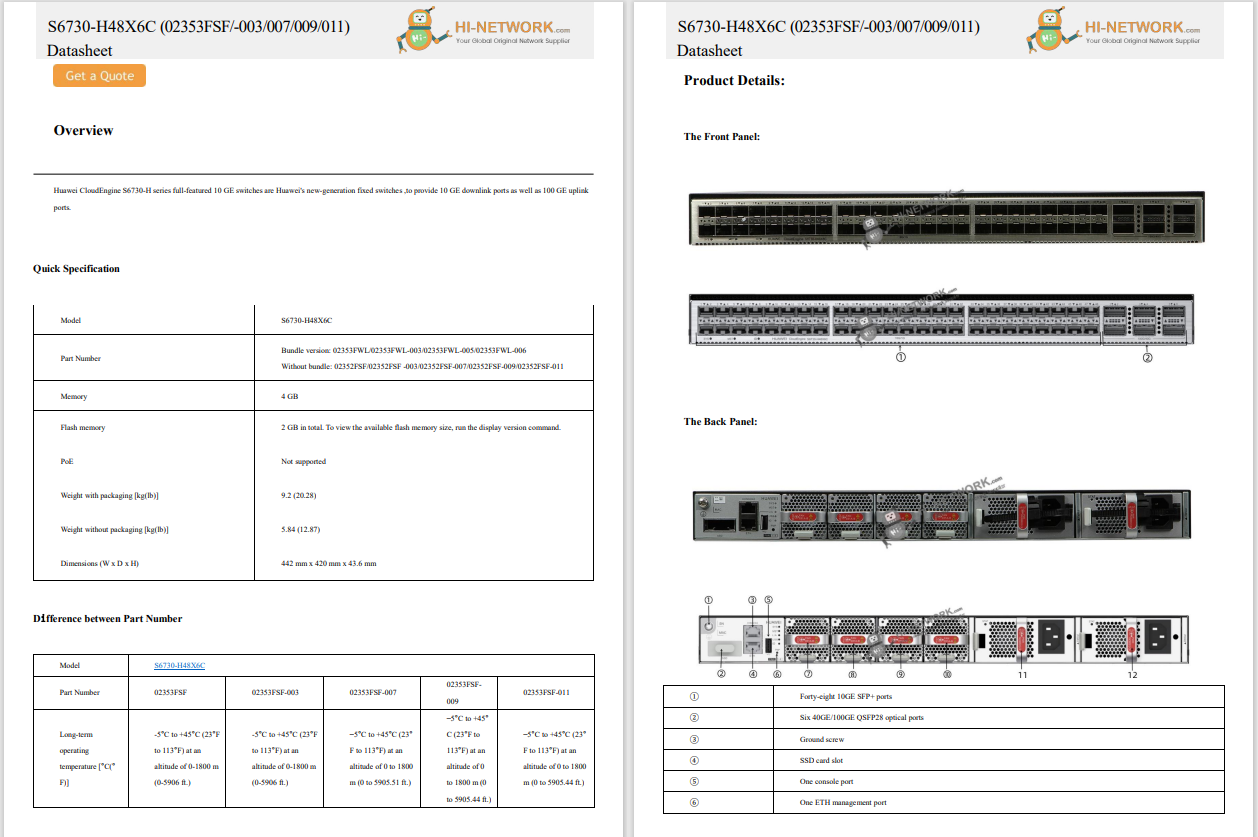
Register now for better personalized quote!


 Getty/SOPA Images
 Gmail is my go-to app for email on Android. Although I do find it to be the easiest app to use, it's not exactly famous for being highly configurable. However, there are a few options within the Settings page that give you just the right control over how you interact with the app.
Case in point, the swipe actions. Out of the box, Gmail is set up such that a left swipe of an email deletes it and a right swipe snoozes it. Or, if you're using a non-Gmail email account, the left swipe will delete it, and the right swipe is disabled.
Also:How to use confidential mode in Gmail to protect sensitive information
So, how do you configure those swipes to do exactly the thing you want? Let me show you.
One thing to keep in mind with the swipe action settings is that the Snooze option is only available to Gmail accounts, so don't expect to be able to apply that option to any other account.
The only thing you need to customize the swipe settings is the Gmail app and at least one configured email account. Once you have those two things ready, you're good to go.
Log in to your Android device and open the Gmail app. Once that app is opened, tap the three horizontal line menu button in the upper left corner of the app, scroll to the bottom of the left pane, and tap Settings.
The Gmail Settings is found at the bottom of the left pane.
Jack Wallen/From within the main Settings page, tap General Settings, which should reveal the Mail Swipe Actions options. Tap that option.
The Mail Swipe Actions option in the Gmail Settings.
Jack Wallen/In the resulting page, you'll see two options, one for Right Swipe and one for Left Swipe. Tap CHANGE at the right of the Right Swipe action and, when the popup appears, configure the action you want to associate with the Right Swipe action.
Configure both the right and left swipe actions here.
Jack Wallen/Do the same thing for the Left Swipe action as you did for the Right Swipe action. It doesn't matter which action you configure; you'll see the same list of available options. You can even configure both Right and Left Swipe for the same action if you like or even disable one or the other.
If you opt to disable one (or both) of the Swipe Actions, just select None from the popup list, and that action will be disabled.
Once you finish the configuration, back out of the Settings page until you're back in the main Gmail window. You should then be able to swipe right or left to act on any given email.
As I mentioned before, the only action you cannot configure for non-Gmail accounts is Snooze. Other than that, you can configure whatever action you like (or none at all). If you're looking for a more efficient way of interacting with the Gmail app, I highly recommend you configure both the left and right swipe actions. Although you are limited in what you can do with those gestures, getting them configured to suit your workflow can make a big difference.
 Hot Tags :
Services & Software
Operating Systems
Mobile OS
Hot Tags :
Services & Software
Operating Systems
Mobile OS
Register Email now for Weekly Promotion Stock
100% free, Unsubscribe any time!
Add 1: Room 605 6/F FA YUEN Commercial Building, 75-77 FA YUEN Street, Mongkok KL, HongKong Add 2: Room 405, Building E, MeiDu Building, Gong Shu District, Hangzhou City, Zhejiang Province, China
Whatsapp/Tel: +8618057156223 Tel: 0086 571 86729517 Tel in HK: 00852 66181601
Email: [email protected]
 English
 Pусский
 Français
 Español
 Português