





While XR headsets like theMeta Quest 3 enable you to immerse yourself in new worlds, or to see fantastical objects overlayed onto the real world, I can't show you that here because we're not in a 3D environment. We can, however, show you screenshots and screen recordings that will help you imagine what the experience is like.
Also: Meta Quest 3 review: The VR headset most people should buy
Today, I'll walk you through the basic steps of capturing a screenshot or a screen recording. I'm also going to show you a few creative techniques I've figured out that make some of those captures more usable by your readers.
Using one of your meta controllers, press the Meta button and pull the trigger.
I'm showing two controllers so you can clearly see the buttons. But when you initiate a screen capture or recording, press both the Meta button and the trigger on thesamecontroller.
The Meta button is the concave button on the controller. I find that pressing that first and then quickly pulling and releasing the trigger does the job quite well.
That was the science. Here comes the art.
Oddly enough, screenshots on the$500 Meta Quest 3 are much higher resolution than screenshots on the$3,500 Apple Vision Pro . The Vision Pro captures screens at 1920x1080. The Quest 3 captures them at 2160x2160.
A screenshot with a resolution of 2160x2160 has 4,665,600 pixels, while a screenshot with a resolution of 1920x1080 has 2,073,600 pixels. That means the 2160x2160 Quest 3 screenshot has 125% more pixels than the 1920x1080 screenshot. That's more than twice the resolution.
This is both a benefit and a disadvantage, depending on what you're trying to capture a screenshot of. For articles like this, my assumption is you want to capture user interface screenshots -- and those are deceptively challenging.
Take a look at the image below. This is the page in the Settings interface that provides the version number for the current software.
It was taken by pressing the Meta button and pulling the trigger when the window was at its default viewing distance. When using the Quest 3, that window is quite easy to see and read. But as you can see, there's a lot more of the Quest environment around it, with the environment taking up almost 90% of the image you see.
Now look at this one:
It's much easier to read the version number, isn't it? That's because I moved the window forward, completely filling up the field of view. It was annoying, because it felt like my nose was pressing up against the window. But the benefit of that inconvenience was that the process allowed the details I wanted to fill the screen and, therefore, fill the frame of the screenshot.
Also: I recorded spatial videos to view on Vision Pro and Quest 3 and you can download them
It's good to practice until you get the image you want. This one is pulled forward, but not to the point where the image was planted right in my face.
Because the screenshot itself has a fair number of pixels, the image above could be cropped and distorted in Photoshop.
The result is a fairly clean screenshot:
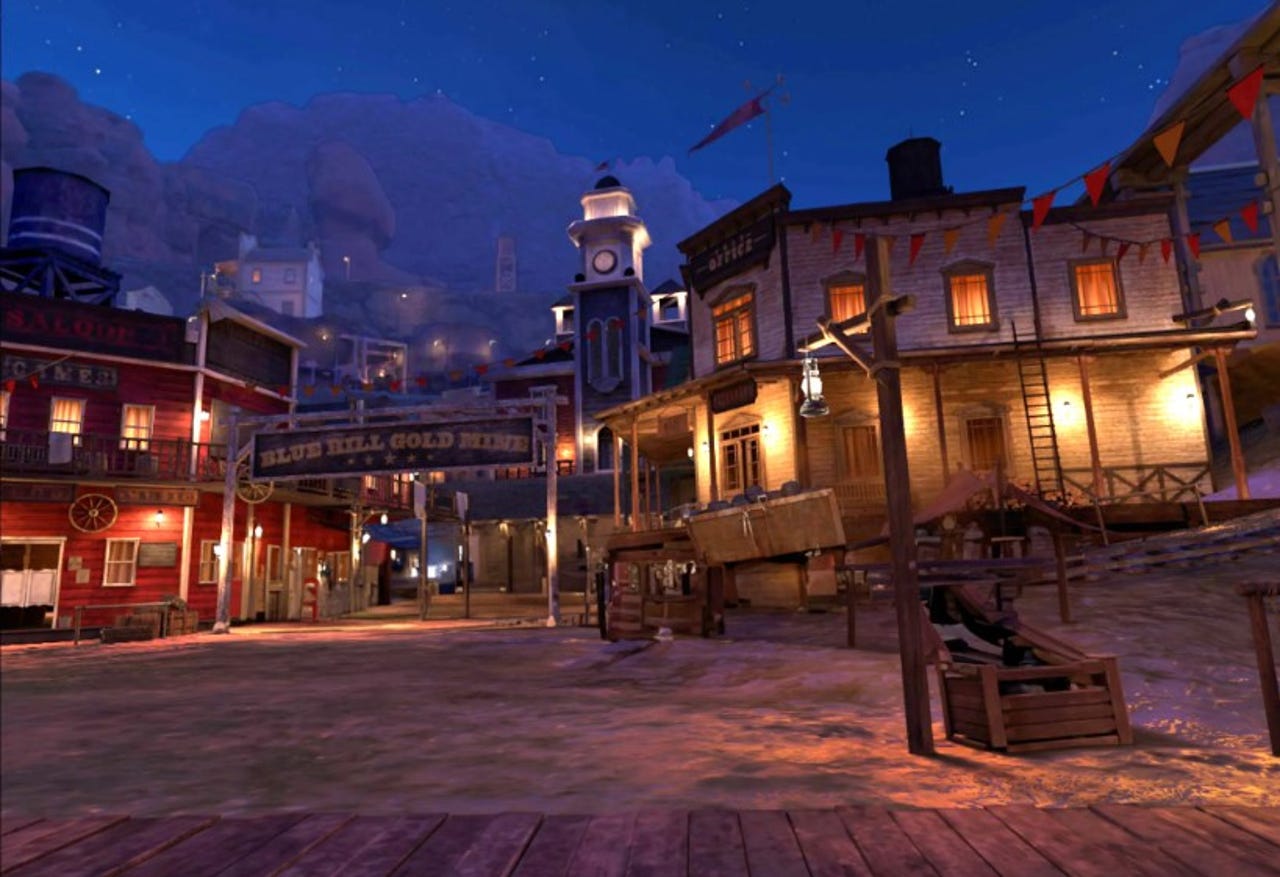
Of course, if your goal is to capture something other than just a basic screenshot, do your best to compose your shot by placing your head just so (as you would if you were shooting with a physical camera), and take the shot. This is the Blue Hills Gold Mine environment, with a little Levels adjustment provided by Photoshop.
This is my favorite environment, so I have it set as my default.
There are two ways to capture a screen recording. The first is the one I usually use because it's far faster. Just do exactly the same thing you do to capture a screenshot, except hold the trigger longer.
Also: I've tried Vision Pro and other top XR headsets and here's the one most people should buy
So, hold down the concave Meta button on your controller, and then hold the trigger until you see the red dot that indicates that you're recording the screen. Once that dot appears you can release the button and the trigger. To end the recording, once again hold the button and the trigger, this time until the red dot disappears.
The other way is to initiate it via the Camera interface. Tap the camera icon on your dashboard bar (shown at1, below). We'll come back to the item indicated at2when we talk about screen capture settings.
In any case, once you click the camera icon, you'll see the Camera interface. Notice the Record button. Also, notice that most of the clips below the record button say "synced." That indicates they've been synced down to the Meta app on my iPhone. We'll come back to that later, as well.
For now, though, go ahead and tap the Record button in your virtual view. You'll see this prompt.
As you can see, the above dialog has an "Include mic audio" option. This is the only real reason I can see for using the the longer process of going into the Camera icon, hitting Record and confirming over just hitting the Meta button and pulling the trigger. It allows you to add commentary right over your recording.
By default, the Meta Quest 3 creates square screen recordings at 1024x1024 resolution. I don't know why, but it does. You can bump that up to the same 1920x1080 resolution that the Apple Vision Pro uses for its screen recordings by tweaking a few settings.
Also: Meta Quest 3 vs. Apple Vision Pro: How accurate was Zuckerberg's review?
First, go into the Quest's settings by clicking in the mini control area on the dashboard, as shown in (2) above. Then click the gear icon you'll see in the upper left corner of the main control panel screen. That will give you the main Settings interface. Click Camera.
There are quite a few camera settings you can tweak; for now, just scroll down until you see Aspect Ratio and change it from Square to Landscape. This change sticks, so you won't have to go back and do it again the next time -- unless you want it square. It's hip to be square, but the videos aren't quite as nice.
This is where screenshots on the Apple Vision Pro work much more smoothly than on the Quest 3. When you take a screenshot or capture a screen recording on the Vision Pro, that media drops into the Photos app, which is automatically synced to iCloud, and then to all your other Apple devices. Once iCloud syncs, you can copy multiple screenshots or recordings at once to the desktop, simply by selecting several items and dragging and dropping.
Also: Apple Vision Pro tricks: How to take perfect screenshots and recordings (and avoid weirdness)
By contrast, the process for transferring recorded screenshots and video is a pain on the Quest 3. Once the media syncs to your app on your phone (iOS or Android), you'll see your images and recordings in the Gallery interface of the Meta app.
But you can't just select a set of images you want and save them to a folder. No, you have to select each one individually and transfer it. On the iPhone, I use the often annoying AirDrop to accomplish this.
For this article, I collected 33 screenshots and videos, which I had to then filter through on my computer to decide which I wanted to use. By the time I was done... well, let's just say my profanity feature got a pretty good workout and my annoyance meter had entered well into the "cranky" zone.
But it works, so there's that.
You've seen the screenshot quality all through this article, but I thought you might want to see a couple of video captures as well.
This first video shows the few frames after I started a screen recording via the camera interface. It provides a short look around at the Blue Hills Gold Mine environment.
This second video shows a completed puzzle from the Puzzling Places game. You can sort of see the snow texture in the video. But inside the Quest 3, that looks like real snow. It's pretty amazing.
And there we are. You now know how to capture screenshots and make screen recordings. What do you think? Have you taken any screenshots or made any screen recordings inside your headset? What was your experience? Let us know in the comments below.
You can follow my day-to-day project updates on social media. Be sure to subscribe to my weekly update newsletter on Substack, and follow me on Twitter at @DavidGewirtz, on Facebook at Facebook.com/DavidGewirtz, on Instagram at Instagram.com/DavidGewirtz, and on YouTube at YouTube.com/DavidGewirtzTV.
 Hot Tags :
Tech
Wearables
AR + VR