

Setting up a Cisco wireless router involves several essential steps to ensure optimal performance and security. Begin by verifying your internet connection by directly connecting a computer to your modem or ISP gateway. Gather the router’s documentation, including its default username and password, and check if the manufacturer offers a setup app for convenience.
Place the router in a central, open area for better Wi-Fi coverage. Connect the router to the internet using an Ethernet cable plugged into its WAN port or consider a mesh network if necessary. Ensure the router's LED lights confirm an active connection, and test the connection using a device.
If your ISP provides a gateway with an integrated router, disable the built-in router to avoid network conflicts. Connect the gateway’s LAN port to the router’s WAN port, power up both devices, and allow them to initialize.
Access the router’s setup interface through a mobile app or by typing its IP address into a browser. Log in with the default credentials, then immediately create a secure username and password. Update the router’s firmware to benefit from security improvements and fixes.
Change the default Wi-Fi username and password to secure your network. Leverage auto-configuration tools like DHCP for managing IP addresses and enable security features such as firewalls, web filtering, and VPNs to enhance network protection.
By following these steps, you can efficiently configure your Cisco wireless router for a robust and secure network environment.

Wireless routers are commonly found in homes -- they're the hardware devices that Internet service providers use to connect you to their cable or xDSL Internet network. A wireless router, also called a Wi-Fi router, combines the networking functions of a wireless access point and a router.
A router connects local networks to other local networks or to the Internet. A wireless access point connects devices to the network wirelessly, using radio frequencies in the 900 MHz and 2.4, 3.6, 5, and 60 GHz frequency bands. The latest wireless routers are based on the IEEE 802.11ac Wave 2 standard, often shortened to Wave 2.
A wireless router is sometimes referred to as a WLAN (wireless local area network) device. A wireless network is also called a Wi-Fi network.
Wi-Fi has become synonymous with wireless connectivity. A Wi-Fi hotspot is a location where you can use your Wi-Fi compatible devices to connect to the Internet.
But despite endless speculation, the term itself is meaningless. It's not an abbreviation or a standard.
Wi-Fi is a brand name created by marketing firm Interbrand for the founding member of the Wireless Ethernet Compatibility Alliance (now called the Wi-Fi Alliance). The name was meant for use as an interoperability seal and for marketing efforts.
The IEEE 802.11 standard defines the protocols that enable communications with current wireless devices, including wireless routers and wireless access points.
The most common way for users to connect to the Internet wirelessly is with a desktop wireless (Wi-Fi) router. Usually these routers look like small boxes with several short antennas to help broadcast signal throughout a home or an office. The farther a user is from the Wi-Fi router, the weaker the signal is. So there are usually multiple wireless routers placed throughout the workspace, in an array allowing for extended Internet coverage.
Mobile hotspot is a common feature on smartphones with both tethered and untethered connections. When you make your phone a mobile hotspot, you share your wireless network connection with other devices so that they can access the Internet too.
A portable Wi-Fi hotspot is a type of mobile hotspot. It's a small device supported by cellular carriers that broadcast a 3G or 4G signal that multiple devices can share wirelessly. Similar to a cell phone, the portable hotspot's monthly cost is based on the data plan you select. A portable Wi-Fi hotspot is a more reliable way to access the Internet than public Wi-Fi hotspots.

If you've chosen routers carefully, hopefully you're getting started with models that provide easy tools for setup—like a mobile app or web dashboard. Since every router is different, setup won't be the same from router to router. Below are basic steps that should be common to all router setups.
If you don't have a good internet connection, the router setup experience will be frustrating. The simplest method is to connect a computer to the modem or gateway device supplied by your Internet service provider (ISP). If your computer detects an Internet connection, you're ready to set up the router.
Here's another "seems obvious" step—but one that will save you aggravation when you're in the middle of setup. Keep an eye out for stickers or slips of paper that might include important setup information, like the router's default username and password.
Many router manufacturers provide mobile apps or web dashboard that can be used for both setup and management. With a smartphone app, you may not have to connect the router to a computer to configure it. Check the documentation that came with your router to see if an app is available.
If the router has antennas and they're separate from the router box, you'll need to install them. In addition, you should extend the antennas before beginning the setup process.
The best place for a wireless business router is in an open area of the workplace, as you'll benefit from even coverage. However, sometimes it's not easy to find a space out in the open because you must connect the router to a broadband gateway from your ISP (Internet service provider), which is usually attached to a cable near an outside wall.
Attach the router to a cable - or choose a mesh router
To solve the "long-distance" problem when connecting a router, you can use a CAT5e or CAT6 cable to connect the router to the ISP gateway's Ethernet port. Another option is to run Ethernet cables through the walls of your office to the chosen central location for the router.
Yet another option is to install a mesh network with a router. A mesh network allows you to place multiple Wi-Fi transmitters across your home or office, all on one network. Unlike extenders, which can be used with any wireless router, mesh networks require a router with this capability built-in.
No matter which option you choose, you'll use a basic Ethernet cable, plugged into the router's wide-area network (WAN) or Internet port. The Internet port is typically set apart from other ports by a different color.
Your router's LED lights tell you if you've successfully made an active Internet connection. If you don't see lights confirming such a connection, make sure you've plugged the cable into the correct port.
Confirm that your router has a working connection by plugging a laptop computer into one of the device ports on the back of the router. If all goes well, you should be able to begin a wired connection, just as you did when confirming an active Internet connection.
In some cases, ISPs offer customers gateways with built-in routers. In most cases, these combined devices are not built for business environments, nor do they have extra ports, security, and other options that allow you to add services and expand networks as the business grows.
If you have a gateway with an integrated router, you'll have to configure the gateway to disable the router and pass the WAN IP address—the unique Internet protocol address that the Internet provider assigns to your account—and all network traffic through to your new router.
If you don’t take this step, you may run into conflicts that prevent devices from working properly. You may need to contact your ISP for help with this step.
First, turn off the gateway. If there is already an Ethernet cable plugged into the gateway's local-area network (LAN) port, unplug the cable and plug it into your router's WAN port. Turn the gateway back on and wait a few minutes for it to boot up. Plug in the router's power supply and turn it on, again waiting a few minutes.
The easiest way to continue with router setup is to use a mobile app if the router maker provided one. If there is no app, or you'd rather use the router's web-based dashboard, connect the router to a computer via an Ethernet cable.
You might find the router's IP address printed on the back of device itself; if not, type 192.168.1.1, a common router address, into the browser search bar.
To configure the router, you'll need to log in, using its default admin name and password. You can usually find this information printed on the router itself, or in an accompanying user manual.
Next, enter the required credentials. Once you're in, you should immediately create a new username and password. The defaults are usually something like "admin" and "password1234," which are obviously not secure—so make sure to change them at the first opportunity.
Your router may need an update of the "firmware," or software that operates it. Update it as soon as possible, since the new firmware might fix bugs or offer new security protections.
Some routers may download new firmware automatically, but many do not. You may need to check for updates through the app or the browser interface.
Just as most routers come with preassigned admin usernames and passwords, most also come with preset Wi-Fi usernames and passwords. You’ll likely be prompted to change the Wi-Fi username and password, but even if you don't see such a prompt, plan to do so quickly.
If your router is equipped with auto-install features, rely on them to help complete setup. For example, you should be able to use auto-configuration to manage IP addresses with the Dynamic Host Configuration Protocol (DHCP), which automatically assigns IP addresses to devices. You can always change these addresses later.
Many router manufactures provide security functionality to safeguard network and user privacy. You can login into the web dashboard and enabling added security features such as firewall, web filtering, and access controls to protect yourself from malicious traffic. You can also set up virtual private networks (VPNs) for privacy.
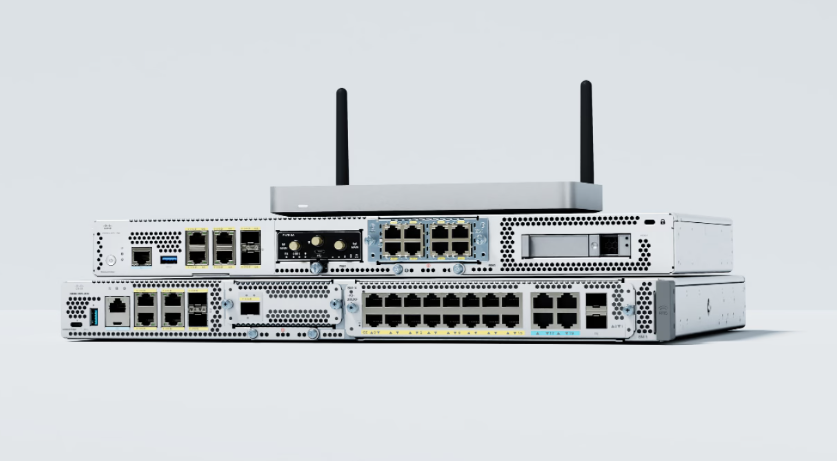
Cisco wireless routers cover a wide range of series and models, catering to different scenarios such as home use, small businesses, large enterprises, and service providers. Below are some common series and model categories:
These routers are cost-effective and suitable for home and small office use.
Cisco RV Series (Small Business Routers)
RV160W: A wireless router designed for small offices, supporting VPN and basic security features.
RV340W: A more advanced model with dual WAN support and wireless networking.
Enterprise routers offer higher performance and scalability, ideal for large network deployments.
Cisco Catalyst Series
Catalyst 9100 Series Access Points: While technically wireless access points, they work alongside routers to provide high-performance Wi-Fi 6 connectivity.
Catalyst 9800 Series Wireless Controllers: Used for centralized management and optimization of wireless networks.
Cisco ISR Series (Integrated Services Routers)
ISR 1100 Series: Supports wireless connections and various WAN options.
ISR 4000 Series: Advanced routers designed for branch offices, with wireless module support.
Cisco Meraki MX Series
MX64W: A wireless security router for small offices or homes.
MX68CW: A more complex router with wireless and cellular backup options.
The Meraki series is known for cloud management and ease of deployment, making it ideal for modern networking needs.
These models are primarily used by service providers and in data centers.
Cisco ASR Series (Aggregation Services Routers)
These don’t have built-in wireless functionality but can be paired with wireless modules or access points.
Note: Many of Cisco’s wireless capabilities rely on wireless access points (APs) and wireless controllers rather than traditional routers with built-in wireless functions. When purchasing, choose the appropriate combination of devices based on your requirements.
Cisco All Series Routers New and Refurbished
Cisco Wireless AP and Controllers
For Cisco product list and quote, please visit: https://www.hi-network.com/categories/cisco or contact us at www.hi-network.com (Email: [email protected])
 Hot Tags :
Wi-Fi
Cisco Routers